Friday, October 28, 2011

First Outing!

I took R2 to my work for the school's Tunk 'n' Treat event. He was a hit! From the time R2 rolled out of the front door of the school to head to the parking lot he was swarmed. At one point I had families lined up 10-12 deep waiting to take pictures with him. I didn't have any problems with the kids, but that's probably because I know them all.

I didn't even think to take pictures until the end...

Here's the few pictures I got!


As you can see, I lost the booster cover on the left leg. Just needs to be glued back on. I had a blast and can't wait to take him out again!


Friday, September 23, 2011

9 Ch Radio

I love the days where I come home and find a box sitting at my front door. Today was my new 9ch radio. Looks good (not that I know what to look for). Much more complicated that I was really going for. It's gonna take me a while to figure out how to set up all the switches and knobs...


Saturday, September 17, 2011

New Controller

With the sluggish response and frequent connection problems, not to mention "the crash," I've decided to move away from the C6C. It seems like a great product and it may see action elsewhere in my R2, but probably in my  future MSE.

I've chosen a 9-ch radio. Not very expensive and other R2 Builders have used the same type. I'm hoping to see much better range and finite control with this upgrade. Can't wait to get it in and hook R2 back up!

Sunday, September 11, 2011

Skinny Skin Skin

I'm kinda upset that I wasn't able to get aluminum skins for R2... maybe the next one (don't tell my wife) will get them.

I've been working on putting the styrene skins on. I was really nervous about cutting the rear skins. (still not sure if I screwed it up or not) Front seem to be holding well, rears... not so well...


I've also got my legs going... Just need to work on those pesky booster covers...

Feels like it's all coming together.

Saturday, September 3, 2011

Paint!

The weather has been so hot and humid over the past few week I haven't been able to get anything done outside.

Today was a break in that weather. I got outside for a few minutes and was able to spray!


I let it all sit overnight, then I just couldn't help myself...

Will glue the panels down soon! This is all coming together!

Sunday, August 14, 2011

Lesson Learned...

Today I had my R2 out on the back patio for another test drive before I remove the legs again for some touch up work on the frame. Anyway, for some reason I let my friend take a turn with the controller. He then proceeded to run R2, at full speed, into a table. This busted out the front vent holder, and almost crushed my speakers...

The lesson? Don't let idiots drive...

Like Butter.... On A Roll!

With some issues around the center leg being fixed up, R2 is on wheels and rolling! Oh, and the sound system is up and running perfectly!


I had some problems with the wiring from the C6C to the Sabertooth 2x25.  When I wanted to turn the little guy left, he'd go right. This bothered me for a while...
It turns out that you can easily reverse the signal on the C6C to get it to move right!

Now R2 runs great! He's a lot faster than I thought he would be. Kinda shocked me as I took out a couple plants on the back patio! I need to go over all the bolts on the frame and maybe run some caulk in the seams because R2 squeaks a lot.

I may look into replacing the C6C as the controls seemed a bit "iffy" at times. Maybe it's just the refurbished GameStop PS2 controller. I'll look into picking up a better one before moving away from the C6C.

Now the humidity needs to drop (and the temperature) so I can get some painting done. I can't wait to paint my dome!

Sunday, July 24, 2011

Leg Work... again... again... again... again... again... DONE!

Finally I've repaired and finished my legs. Now I just need to install the resin detail pieces. That will probably happen tomorrow!

Here's my Legs!


Oh, and I got a few more resin pieces in the mail today. Side vents, pocket vents and oct. ports.

Saturday, July 23, 2011

R2 Speaks!

I spent last night wiring the wireless 12 channel RF remote to the Think Geek T-Shirt sound system. Sounds great! I thought it wouldn't me loud enough but it seems like it will be just fine. I can hear it clear on the other side of my house! Now I just need to install the electronics and get things going!

Tuesday, July 19, 2011

Logics Have Lights (Front Logics Anyway)

I spent the afternoon installing the LEDs onto the front PCBs. Everything went in smooth. So much easier than what I had started a few months ago. I decided to use the flat top LEDs thinking it would make the entire bezel area look smooth. Here's a pic of the front logics ready to go.
The tape is so I know which is the top logic and which is the bottom.

Friday, July 15, 2011

Part, Parts, and More Parts

The last few days have brought in lots of goodies!

A pair of utility arms and a set of holoprojectors that I purchased off of another builder.


My dome motor, the popular Pitman motor. Also, the SyRen 10 for to run the motor


I have a few more resin parts that have come in, while I'm still waiting on a few more.
The ones I have are the ankle cylinders, the cylinder holders, front vents, coin slots, power couplings, and the large data port.


I have also received my resin booster covers, but they seem "off."

I've also decided to jump on the Teese bandwagon and picked up an Arduino Uno and a set of the PCBs. I even got a set of the bezels!

Thursday, July 7, 2011

Dome Work

I've gotten a little work done on my dome. Not much, but some. I ended up having to cut my inner dome to get it to fit. I'm not sure if I am doing this backwards or not, but I have attached the top portion of the inner dome before cutting openings for the holos and hopefully (in the distant future) a life form scanner and periscope.


Tuesday, May 3, 2011

CRUSHED

It's been a while since I last updated this.

Here's why...
The leg fell off (I knocked it off) of the table and the top of the shoulder was crushed. It made me more than a little mad.

Monday, April 4, 2011

Skirt Arrived!

I had a box waiting for me today! Az's vaccuformed skirt.

Monday, March 28, 2011

THE DOME ARRIVES!!!

I was suprised when I pulled into the driveway this afternoon. A large brown box was sitting in front of the door. My dome was delivered! Days like today make me happy for mailmen every where. This this is awesome. I thought it would be a little fragile, but it seems pretty damn solid.


Oh, and my JAG hinges arrived today too. Now that I have these in hand I really wish I had ordered several more. Guess there's always next time.

Sunday, March 27, 2011

Leg Work... again... again... again... again...

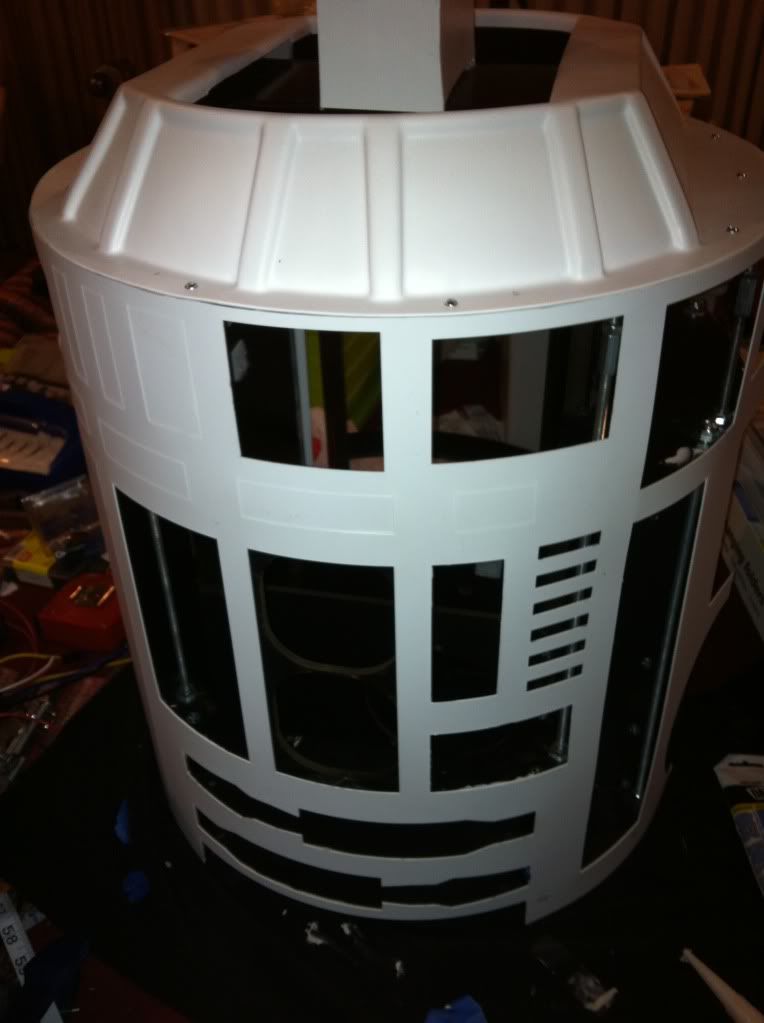
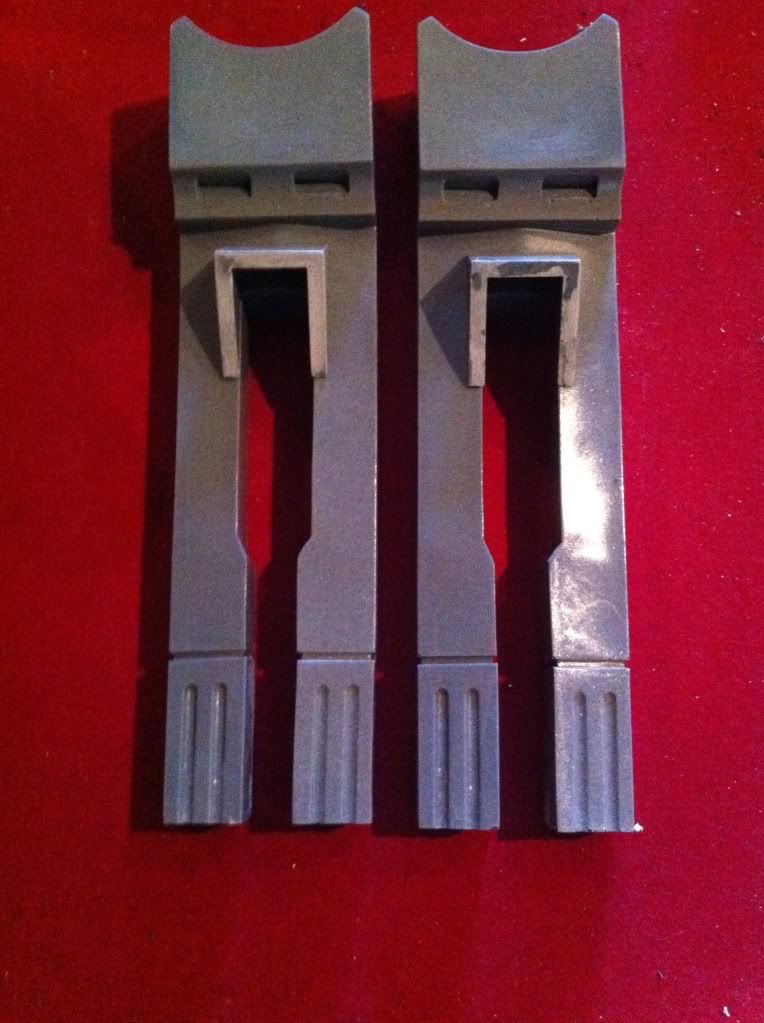
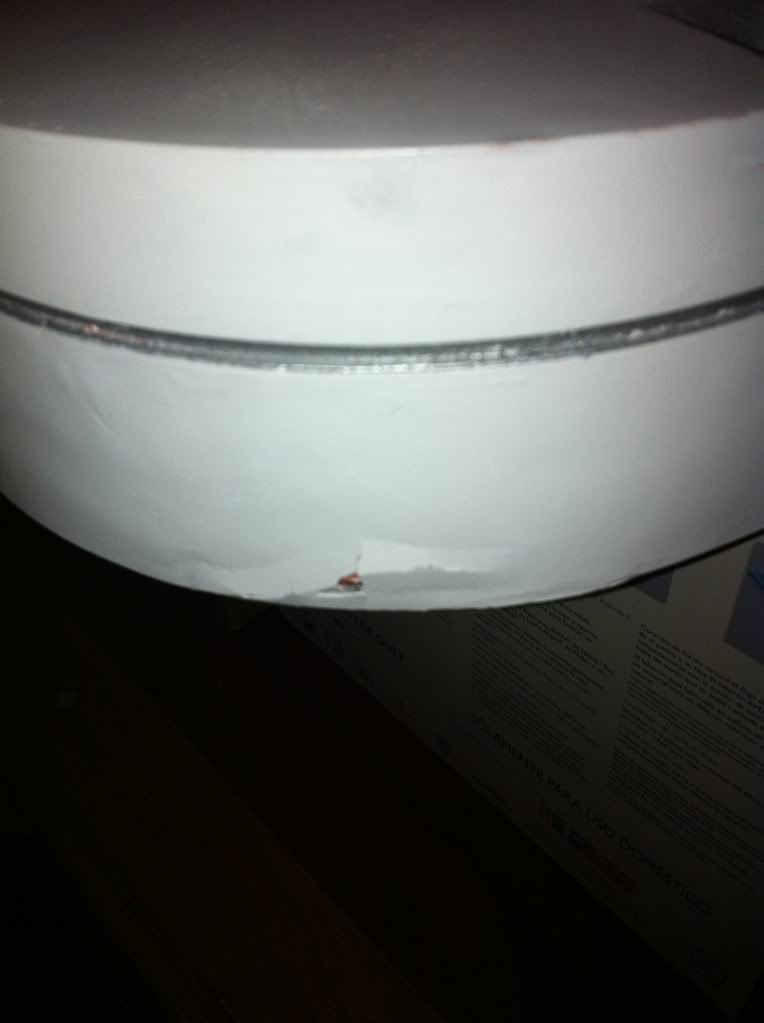
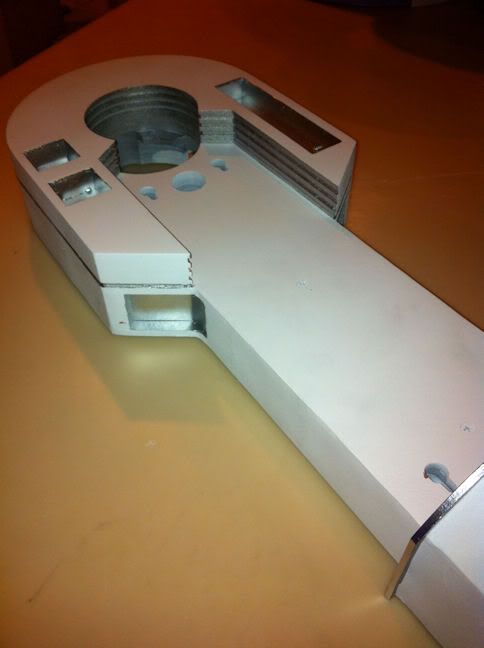
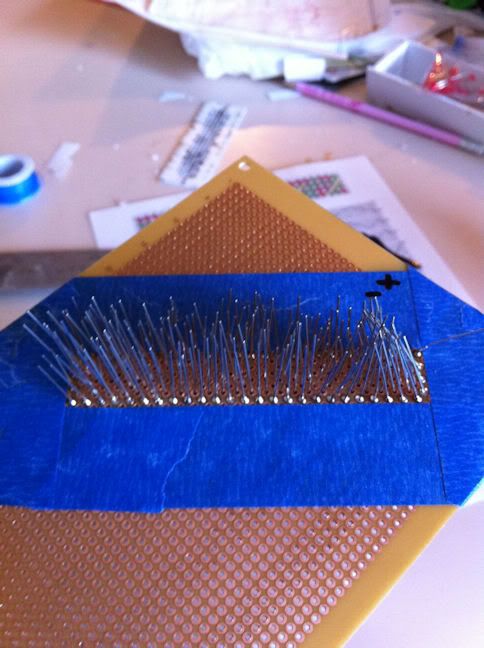
So after looking at the legs for a few days I decided 86% wasn't good enough. The more I looked the lower the grade went. I finally ended up giving them about a 72% on "doneness." So I took a bit more bondo to the seams on the side of the skins and filled a little ding here and there.

This morning I went out and sanded down the bondo and was suprised at how good they looked. I cleaned them up really good, wiped them down with some rubbing alcohol and hit the primer. Everything looked great! I put on several thin coats of the primer and ended up really happy with the results.

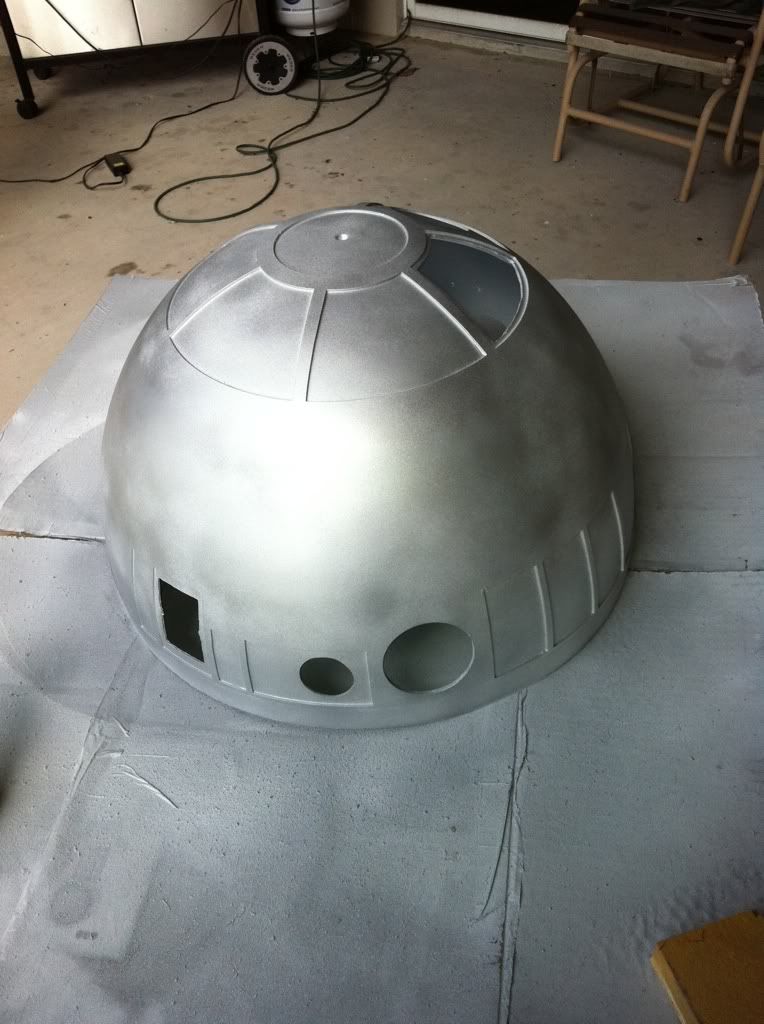
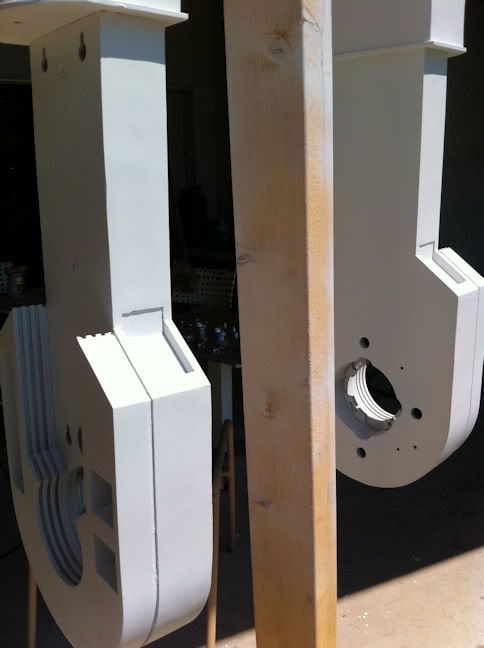
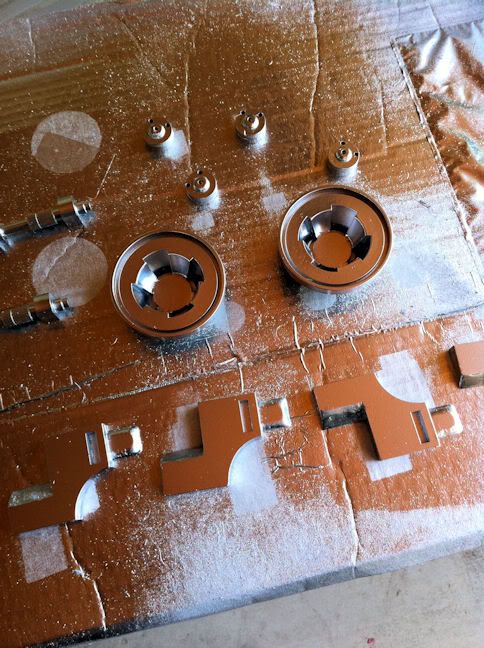
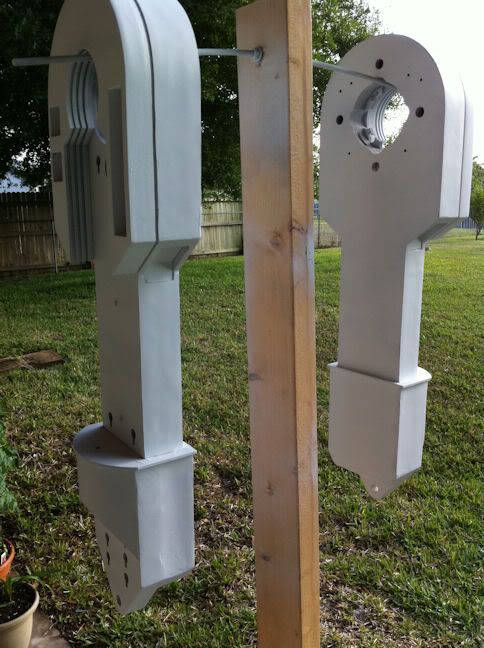
I let the legs sit (or hang) for a while as I watched Florida loose their Elite 8 game. Then I grabbed a can of the Satin White. I must have done 6 light coats and one heavier coat to finish. I left them there for a few hours.


I probably should have left them sitting for a day or so, but I'm very impatient. I masked the legs up with some painter's tape and grabbed my can of "silver."


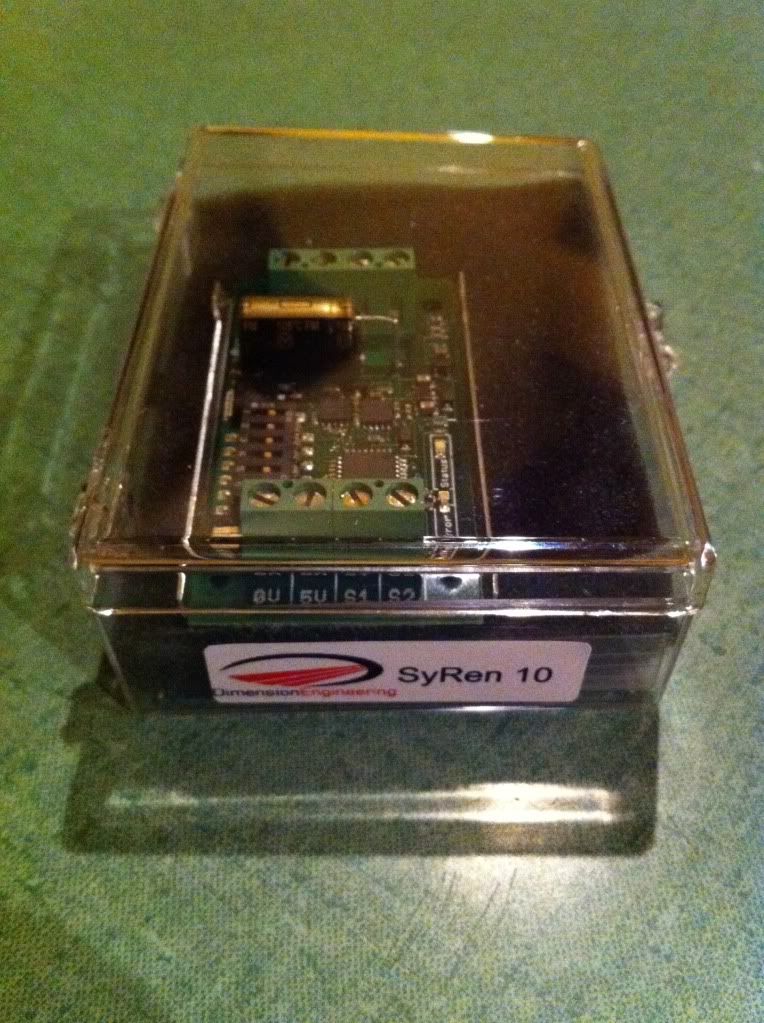
A side note on the paint...
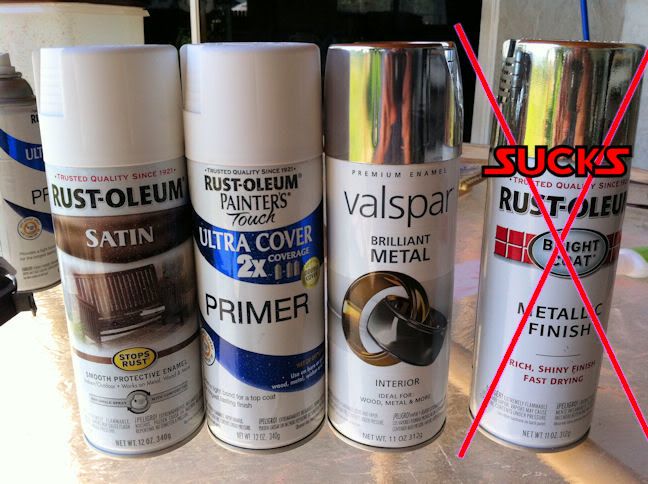
I read about putting the cans in warm water for a few minutes before painting and I must say it's an amazing trick. I highly suggest anyone who uses spray paint for anything to do this. The paint came out super smooth! Also, the Valspar Brilliant Metal paint is AWESOME! The Rustoleum paint sucks the big one...
Here's the paints I've been using so far.


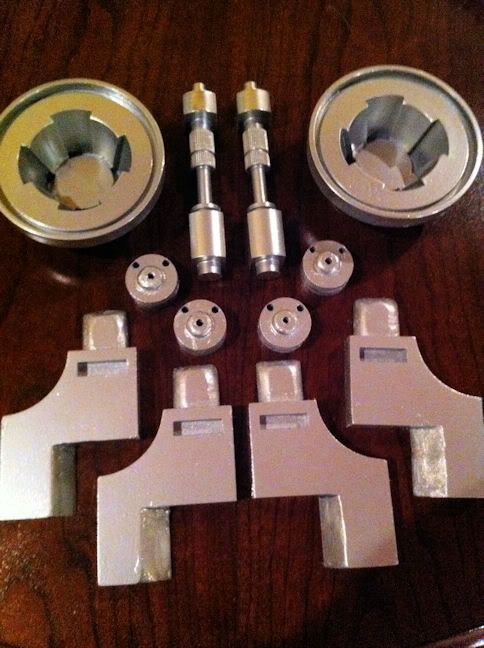
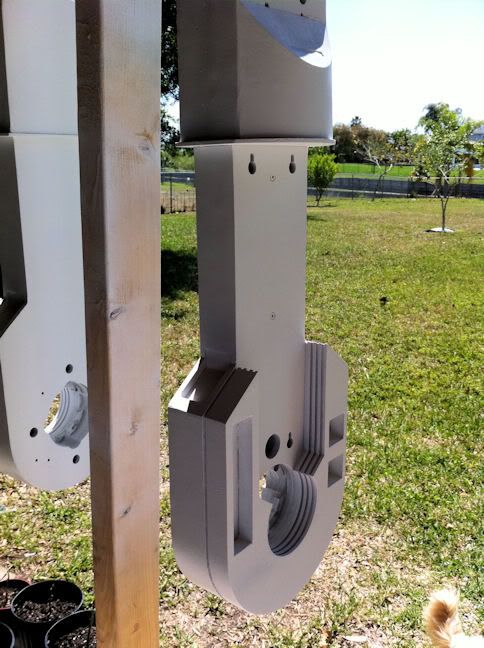
I couldn't wait to take the tape off. I know I should have left it over night, but oh well. Here's the result!

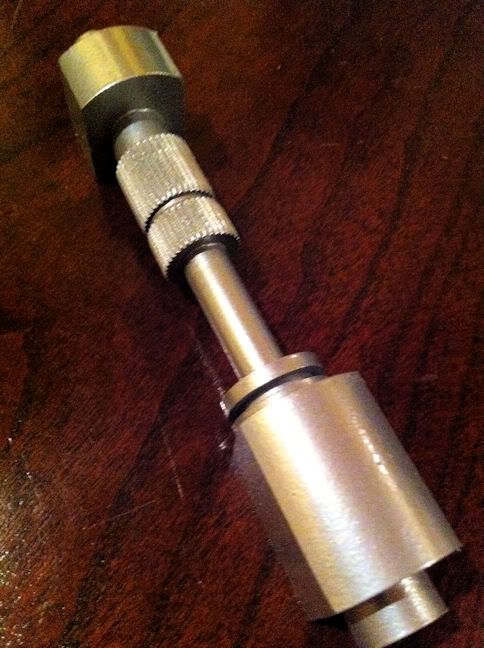
I think they look great! The Valspar looks like real metal. So much better than the Rust-ole-crap! I liked the results from this so much I decided to spray a coat of this stuff on the hubs and hydro's. I probably should have sanded them a bit, but I didn't. Made for a real soft finish. I'm hoping letting them sit overnight will allow the paint to cure a bit more. We shall see. For now they sure look a lot better than the Rust-ole-crap I used before.

Friday, March 25, 2011

Dome Shipped!

I saw today on the Astromech.net forums that my dome has shipped! I can't wait for it to get here. I'm actually really excited!

Thursday, March 24, 2011

First bit of "Silver"

Yesterday I took some parts out and hit them with the silver I picked up a while back. I think it came out Ok... I'm debating if I should pick up some of the Velspar paint that I've seen being used... You decide. Is this "good enough?"


Monday, March 21, 2011

Legs... Again... Again... Again...

Speaking of legs... I still have trouble with the layers of the legs. I tried skinning them first (with the parts from A&A) but the pieces of styrene pealed right off when I tried to sand them a bit.

I then tried Bondo Glazing Putty. It worked on the feet, but it just kept flaking off of the legs, leaving holes and gaps.

Then I hit it with some CA glue. I thought this was going to be the magic stuff. Again, no luck... The glue seeped down into the holes leaving, guess what? HOLES!!!

Now I'm back to skinning them. I did it last night and it looked pretty good when I hung the legs up.

I went out after work today and cleaned them up so I could spray them with the white primer. Overall I'd say "Not Bad". Not 100% perfect... I'd say maybe 87%... Hey, that's a high "B." I'm telling myself that it's good enough.

Looks like now I'm gonna be doing a nice and WEATHERED droid...

If I ever want the end of ANH in the Massassi Temple look I'll go aluminum!

RESIN!!!

My shoulder hub and hydro's came in today. I got them from Don Jarr on ebay. In my uninformed opinion these look great! I cleaned them with alcohol and soap the way Keith described on his site (resinparts.com). Now I need to hurry up and finish the legs!

Friday, March 18, 2011

Couple More Arrivals

This week I got in a few items and picked up another.

My PIC Flasher card, a few relays and some blue LED switches came in. I also stopped in to GameStop and picked up a wireless PS2 controller (and Grand Turismo 5) for my C6C.


I spend a little time and built up my PIC Flasher card, still have to test it... Hope I don't have the common problem with the crystal being bad...

Sunday, March 13, 2011

More things ordered

I ordered my PIC Flasher and some switches today. Time to figure out how to wire up switches and relays and convert my logics to 12v!

Wednesday, March 9, 2011

Productive Day of Nonbuilding

Today I ordered a set of Shoulder Hubs and Shoulder Hydro's. I also sent a message to the resin parts suppliers to place orders for more parts. Oh yeah, got my conformation from Az about my skirt order!

A good day!

Tuesday, March 8, 2011

Skirt Ordered

Just a quick update! I ordered my skirt today. Vacuum-formed ABS plastic.

I also did a little more filling on the legs and ankles. They should be just about ready. Hope to spray some primer before Friday.

Monday, March 7, 2011

PSIs

I am really starting to love my mailman! He always brings me such cool stuff!

Today I came home to find a package waiting for me. I nice set of PSI lights from Mike Velcheck. This things are AWESOME!!!! I can't believe how bright they are, damn near blinded me when I first connected the power. I can't wait until I have something to put them in!

On to the pics.


Going with the standard red/blue and yellow/green colors for R2.
I'll try to get a short video of the flash/fade effect sometime tonight.

Sunday, March 6, 2011

There be Lights Here!

So I decided to take it upon myself to make a set of rear logics. I didn't think it would be too difficult... HA!

Here's the pile of stuff to start it all.

To start I stuck the LEDs into the PC Board according to one of the various templates available. Once they were all in I kinda taped down the sides to get them (kinda) straight.


Then you flip it over and begin soldering...

All done... not pretty but hopefully it works.

Then I pulled out the 30awg wire (this stuff is thinner than my hair!). After cutting 200 some odd 1"-1 1/2" strands THEN stripping both ends you have this mess...

I'm on hold with this right now because I want to be able to test each soldered strand as I go, but I'm not sure how to do that. I've posted about this on Astromech, just waiting for a reply.